Hello, check this
Run Storage Sense
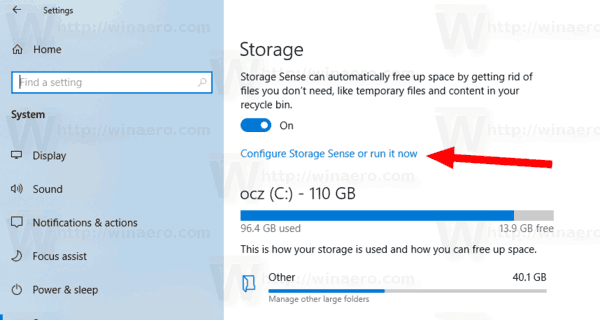
Starting with Windows 10 build 17074, it is possible to run Storage Sense automatically when you are low on disk space. There are a number of presets which can use to schedule disk cleanup. This will allow you to remove redundant files automatically when required. The appropriate options can be found under Settings > System > Storage > Configure Storage Sense or run it now .
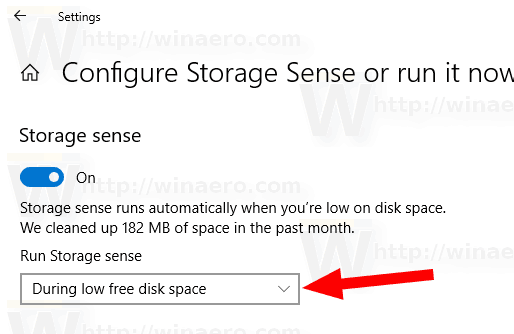
On the next page, you can specify when to run Storage Sense automatically or run it manually.
There is a special Group Policy option that allows you to specify when to run the Storage Sense cleanup procedure for all users. You can force enable the Every day, Every week, Every month, or During low free disk space schedule. Here is how.
To make Storage Sense Run Automatically in Windows 10 using Group Policy,
- Press Win + R keys together on your keyboard and type:
gpedit.msc
Press Enter.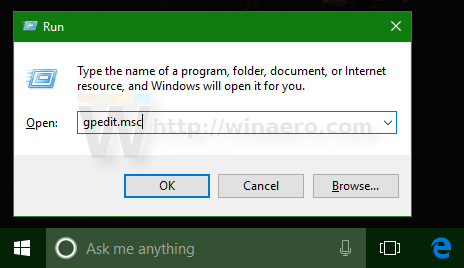
2. Group Policy Editor will open. Go to Computer Configuration\Administrative Templates\System\Storage Sense . Enable the policy option Configure Storage Sense cadence .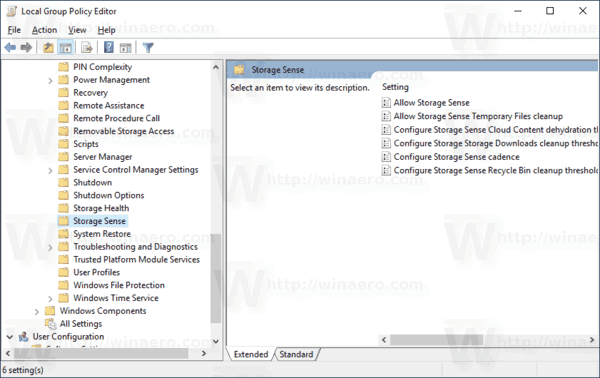
3. Under Run Storage Sense , select Every day, Every week, Every month, or During low free disk space according to what you want.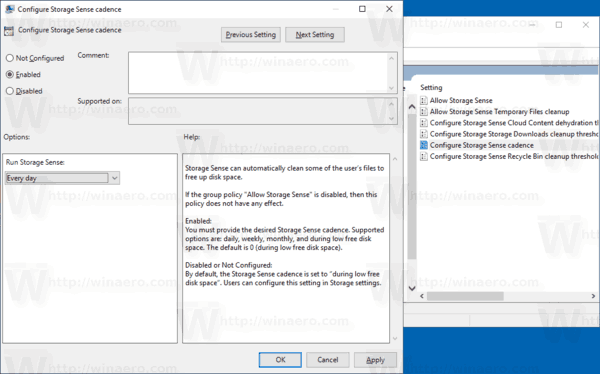
Note: The Local Group Policy Editor app is only available in Windows 10 Pro, Enterprise, or Education edition. For other editions, you can use a Registry tweak described below.
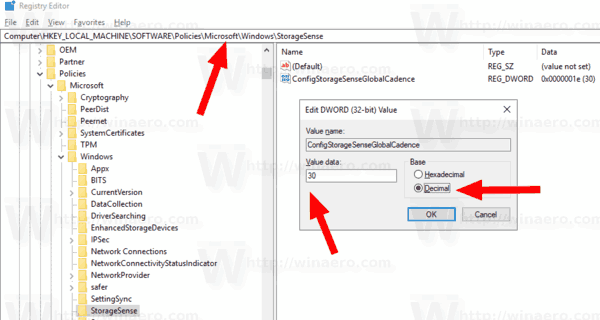
A Registry Tweak
- Open Registry Editor.
- Go to the following Registry key:
HKEY_LOCAL_MACHINE\SOFTWARE\Policies\Microsoft\Windows\StorageSense
Tip: See how to jump to the desired Registry key with one click.If you do not have such a key, then just create it.
3. Here, create a new 32-bit DWORD value ConfigStorageSenseGlobalCadence . Note: Even if you are running 64-bit Windows, you still need to use a 32-bit DWORD as the value type.
Set it to one of the following values in decimals:
0 - During low free disk space
1 - Every day
7 - Every week
30 - Every month
4. To make the changes done by the Registry tweak take effect, restart Windows 10.