Hi,
I would like to disable all of our domain users access to the C Drive on there computers. We are a domain environment so I would like something related to group policy or registry option to disable user access to C driver.
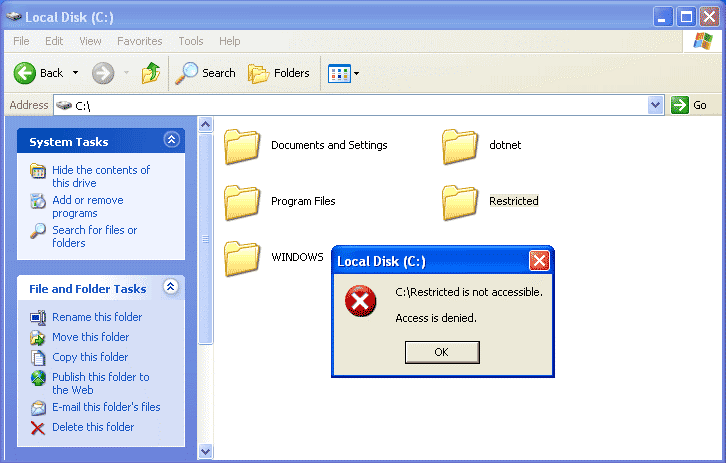
In my early days I have done this on Windows XP. You can see the below reference image when user click on any of the Windows folder they will get Access is denied error. I want exact the same or something related to this option
Thanks
8 Likes
Method 1: Prevent Access To Drives in My Computer in Windows 10 Using Group Policy
-
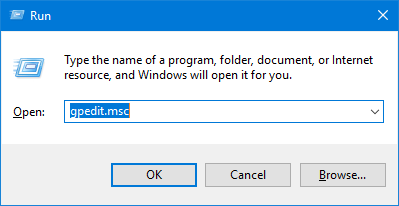
Press the Windows key + R to open the Run box. Type gpedit.msc and hit Enter.
-
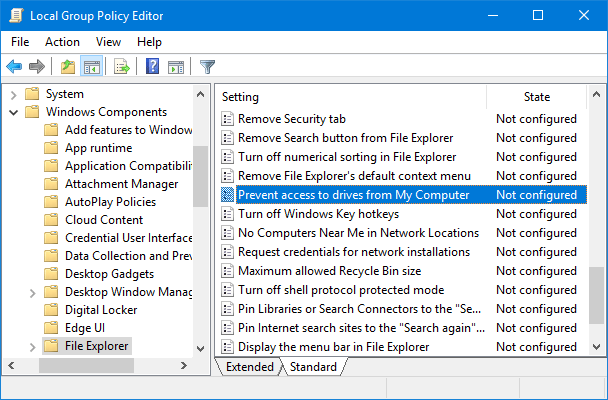
Once Local Group Policy Editor is launched, use the left pane to navigate to User Configuration > Administrative Templates > Windows Components > File Explorer . Now go to the right pane and scroll to find “ Prevent access to drives from My Computer ” and double-click on it.
-
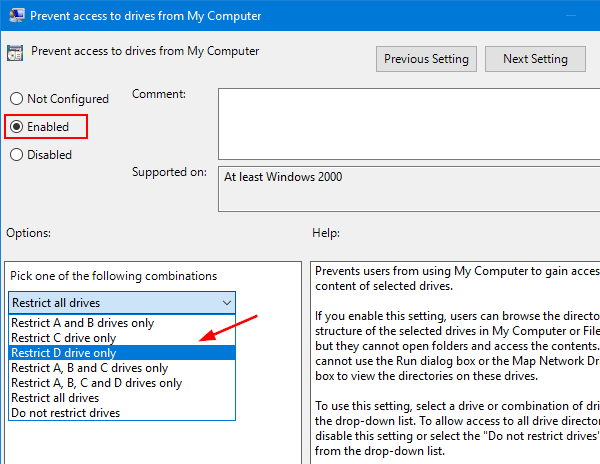
When the configuration box pops up, change the setting to Enabled . Next move to the Options section at the bottom left, and use the drop-down menu to select the combination of disk drives for which you want to prevent user access. Click Apply and then OK .
-
The policy setting will take effect immediately, no restart is required. When a user try to open the restricted drive in File Explorer, they will receive the following error message:“ This operation has been cancelled due to restrictions in effect on this computer. Please contact your system administrator “
4 Likes
Hi @Stefan,
There is an another method to control the Windows drive using Registry Editing.
Method 2: Prevent Access To Drives in My Computer in Windows 10 Using Registry Editor
-
Press the Windows key + R to open the Run box. Type regedit and hit Enter.
-
Once the Registry Editor window is launched, navigate to the following key:
HKEY_CURRENT_USER\Software\Microsoft\Windows\CurrentVersion\Policies\Explorer If the Explorer key does not exist, you can right-click on Policies , select New -> Key and name it Explorer .
-
Right-click on the Explorer key in the left pane, and then select New -> DWORD (32-bit) Value , name it NoViewOnDrive .
-
Next, double-click NoViewOnDrive and set its value according to following list (in Decimal): A: 1, B: 2, C: 4, D: 8, E: 16, F: 32, G: 64, H: 128, I: 256, J: 512, K: 1024, L: 2048, M: 4096, N: 8192, O: 16384, P: 32768, Q: 65536, R: 131072, S: 262144, T: 524288, U: 1048576, V: 2097152, W: 4194304, X: 8388608, Y: 16777216, Z: 33554432, ALL: 67108863
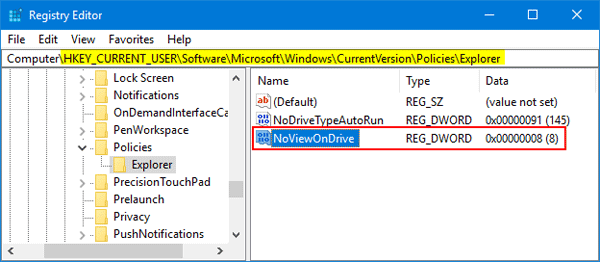
For example, if you want to lock drive D, you have to set the value to 8. If you want to lock both Drive A and drive D, you would add 1 (A) + 8 (D) which means the value should be set to “9”.
-
When it’s done, close Registry Editor. Restart Windows for the change to take effect.
4 Likes
With Group Policy Objects in Windows, there is a “Hide these specified drives in My Computer” option that lets you hide specific drives. However, it may be necessary to hide only certain drive, but retain access to others.
There are seven default options for restricting access to drives. You can add other restrictions by modifying the System.adm file for the default domain policy or any custom Group Policy Object (GPO). The seven default selections are:
- Restrict A, B, C and D drives only
- Restrict A, B and C drives only
- Restrict A and B drives only
- Restrict all drives
- Restrict C drive only
- Restrict D drive only
- Do not restrict drives
Microsoft does not recommend to change the System.adm file, but instead to create a new .adm file and import this .adm into the GPO. The reason is that if you apply changes to the system.adm file, these changes might get overwritten if Microsoft releases a new version of the system.adm file in a Service Pack.