So, Why Does “No Internet Secured” Appearing on your device?
You may have already seen the error message as a notification or a pop up in the System Tray area of the Windows 10 taskbar. But what does “No Internet Secured” actually mean?
This error message is an unusually vague message for Windows 10, that generally means your internet connection is down but in the mean time you do have an active connection.
No Internet is Secured is one of the most frustrating error you will face on Windows 10 but its very simple to resolve in a few steps solutions. We have prepared a list of solution, if you know what you are doing you will resolve this error in just a few mins.
This list will help you solve the “No Internet secured” error on your Windows 10 device:
- Disable your VPN
- Refresh the IP configuration
- Reset Windsock
- Check your PC’s connection properties
- Disable IPv6
- Update the network device driver
- Run Network troubleshooter
1. Disable Your VPN
If you are using any VPN, your VPN client’s built-in security features can cause this problem. Specifically, your VPN behaving like a kill-switch that is designed to disconnect you from the internet when the VPN server goes down.
To check if this is your VPN is the actually causing the problem, disable your VPN or even exit it entirely from the launch menu. Then wait a minute, let your Windows to reconnect to the internet and try a regularly website like google etc.
If you can access the website and everything connects normally, then the problem was with the your VPN server.
2. Refresh the Windows 10 IP Configuration
You may not using any VPN, and our first solution maybe not for you but you are still experiencing continued incidence of the “No Internet secured” message?
Windows has some commands that can help you deal with it. To get started Right-click Start, then select Windows PowerShell and enter the following commands in the PowerShell screen:
ipconfig /release
ipconfig /renew
The above commands will will force your computer to release currently assigned IP address from your DHCP server / local router and request a new IP address from your DHCP server / local router. In most of the times, this will resolve the “No Internet secured” error.
3. Reset Winsock on your device
If you are still facing the “No Internet secured” error, then try out the third solution, using another command line solution to this error.
Now will try to reset the Winsock service, Winsock is the Windows Sockets API and a specification for your Windows 10 device communication with network services, specifically the widely used on TCP/IP.
To reset Winsock, type the below command on the powershell window
netsh winsock reset catalog
Wait a moment; if the network doesn’t automatically reconnect, do so manually.
4. Check Your PC’s Connection Properties
Still no solved? Now try to check your Windows 10 device network adaptor. Press Windows Key + R button on your Keyboard and type ncpa.cpl and enter.
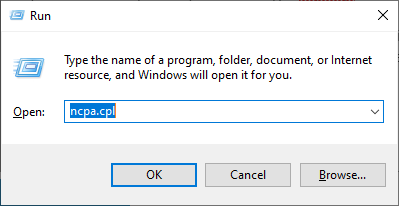
This will open the Network connection Windows of your Windows 10 device and now follow the below setting is enabled in order to resolve the “No internet secured” error
Select the correct network adaptor and right-click on it and click Properties. Confirm the following are checked:
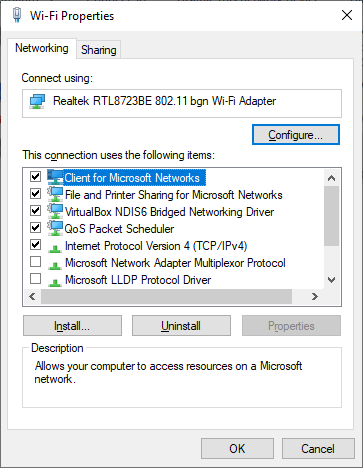
- Client for Microsoft Networks
- File and Printer Sharing for Microsoft Networks
- Internet Protocol Version 4 (TCP/IPv4)
- Internet Protocol Version 6 (TCP/IPv6)
- Link-layer Topology Discovery Responder
Click OK to confirm.
Note: You need to restart your PC if you enabled any of the above setting to make sure it affects on your device properly.
5. Disable Internet Protocol Version 6 (TCP/IPv6)
IPv6 is a networking protocol designed to replace Internet Protocol Version 4 (TCP/IPv4), due to the latter running out of IP addresses. However, some device is not compatible with IPv6 and cause a susceptible to errors. Disabling, the IPv6 IP address will fix the “No Internet Secured” error on your device.
Now again go to your network connection and properties of your network adaptor. Simply uncheck Internet Protocol Version 6 (TCP/IPv6) then click OK to confirm the choice.
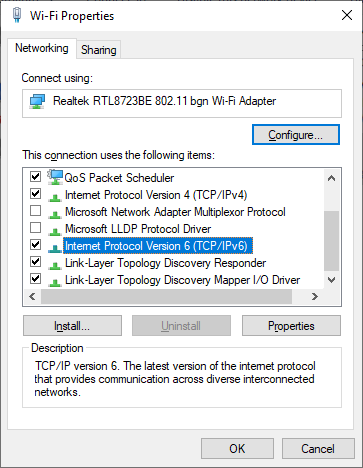
Now Restart your Windows 10 PC.
6. Update Your Network Device Driver
You may be using your Windows 10 device with older version of your network driver software, another chance that the device driver for your network card could be faulty. So, lets try to update your network driver now.
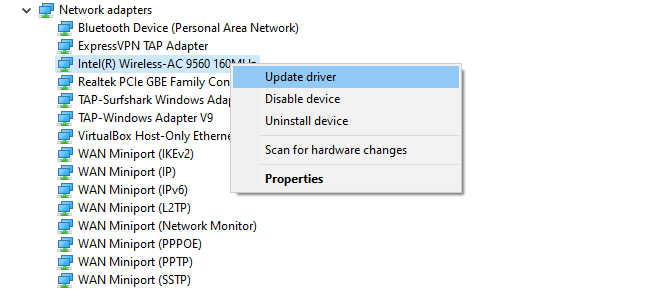
Right-click Start and select Device Manager. Expand Network Adapters, select your network device, then right-click and select Update driver.
Updating the network drivers may fix the “No internet secured” error
Wait until the device driver is updated, then reboot your Windows 10 device. If successful, Windows 10 should automatically connect to the network as usual on the next restart.
If this also doesn’t worked, then try Disable device, reboot the computer, then again Enable Device.
7. Run Network Troubleshooter in Windows 10
Our last suggestion to fix the “No Internet secured” error message.
Windows 10 offers some built-in troubleshooting tools, software tool kits that automatically check for errors and make (or suggest) repairs.
To open the Network Troubleshooter on your Windows 10 device, press Win + I to open Settings, then Network & internet > Network troubleshooter.
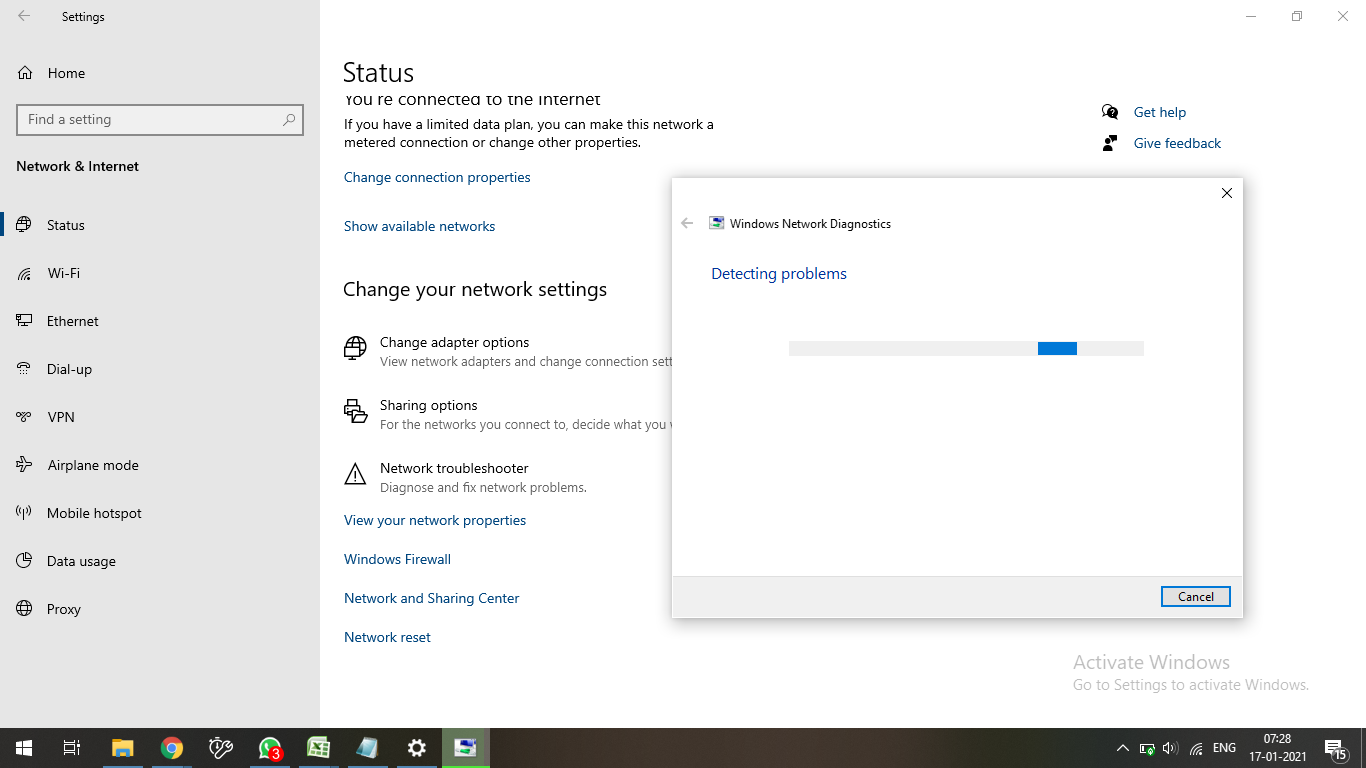
To fix the Windows 10 “No internet secured” error with the network troubeshooter, you have to follow the steps provided in the tool to repair your network connection.