If you encounter an error icon on the Internet connection of your PC, troubleshooting it may show a message that Windows “could not automatically detect network proxy settings.” Don’t worry, because, in this tutorial, we will show you how to solve and fix this issue! Here are the different solutions you can take to help your PC detect network proxy settings.
But before we proceed, we will first define proxy to help you understand the approaches you will learn. A proxy server serves as a go-between for your computer and the Internet. This kind of server is mostly used by schools and businesses, so if you are not using one and such an error occurs, you truly need to have it fixed. Without further ado, how can you solve the “Windows Could Not Automatically Detect Network Proxy Settings” error?
Restart your PC and router. Doing this time-tested operation is a must before moving on to more complicated and technical solutions. It might solve the problem, but if it does not, it is time to conduct the next steps.
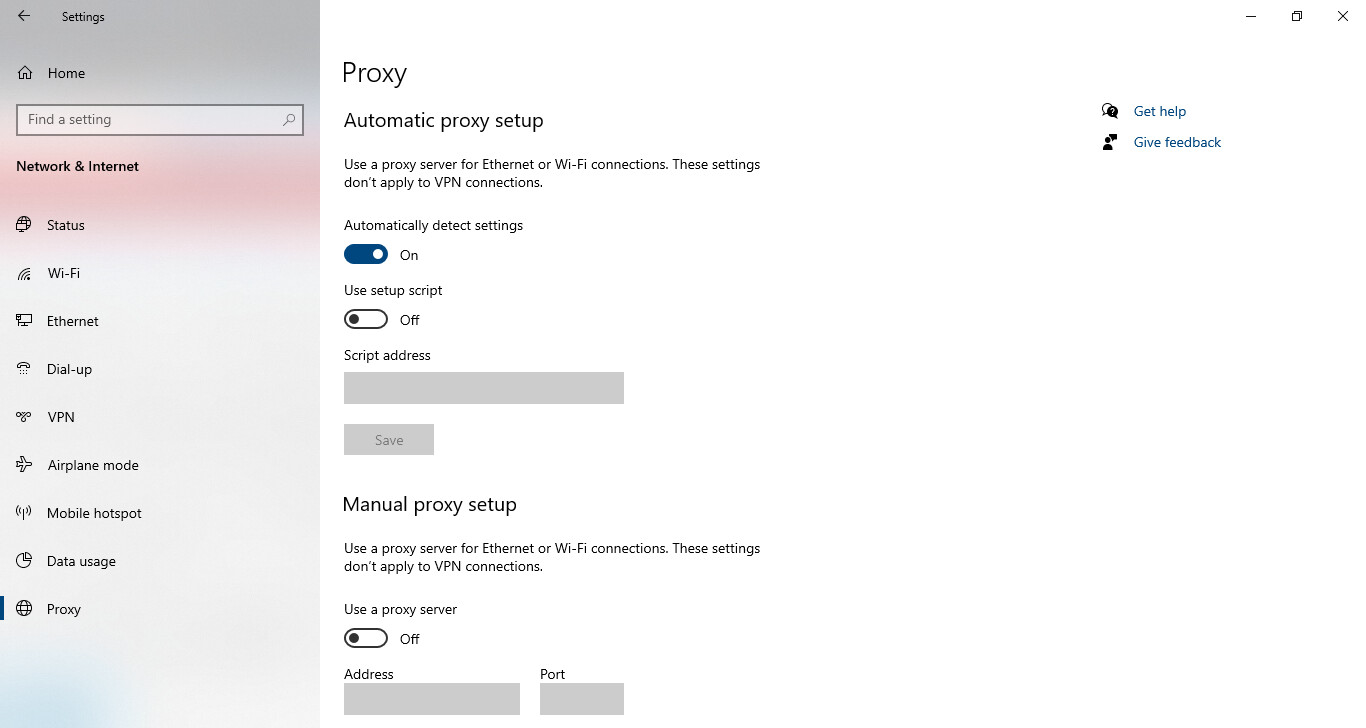
Check the proxy settings and try the Network Adapter Troubleshooter. Open Settings, click Network & Internet, and open the Proxy tab on the sidebar. If you do not use a proxy server, turn off Use a proxy server. If Automatically detect settings is on, leave it as it is. Just in case that this still does not work, you can visit Settings, click Update & Security, and open Troubleshoot.
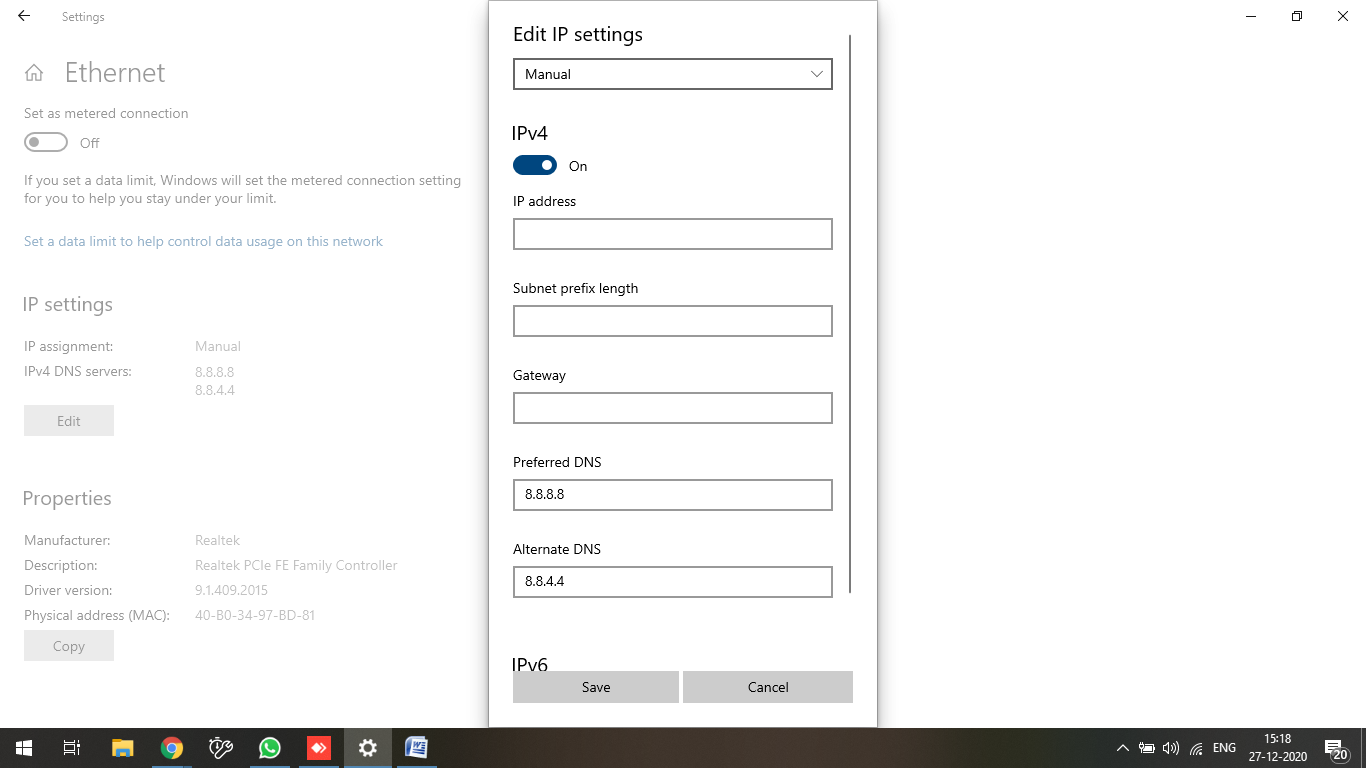
If these easier steps still do not work, you should tinker with your network adapter itself. Go to Settings, followed by Network & Internet, and click Status. Open the Change adapter options button and double-click the one you use in your connection. Then, on the window that will appear, open Properties, double-click Internet Protocol Version 4, and make sure that both Obtain an IP address automatically and Obtain DNS server address automatically are activated.
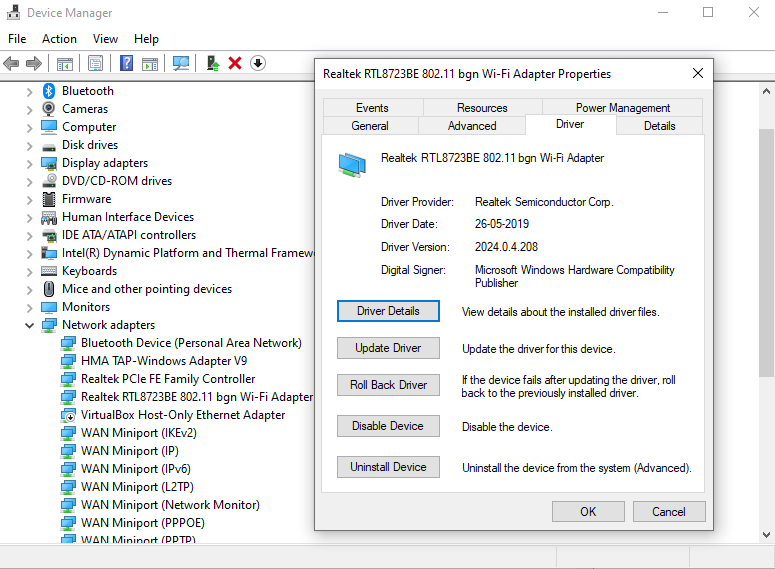
Update your network driver. You can also inspect the hardware of your PC to check if the problem lies there. Right-click the Start button, open Device Manager, expand Network adapters, and double-click the device you use to connect to the Internet. On the Driver tab, you can either choose Roll Back Driver (if the problem started after an update) or Update Driver (if you want to try downloading it on the Internet).
Check your VPN, Firewall, and antivirus protection. There are times when such software interferes with your Internet connection. Perhaps, there is malware that makes your device glitch. If you think this is the case, you can inspect the configuration of your software. You can also scan your PC for malware, and once it is confirmed to be safe, try disabling your VPN and security suites one by one.
Reset your network settings. If the solutions above still fail to work, you can opt to do a reset. If it is okay with you to reconnect to all of your saved networks, you can proceed. Go to Settings, open Network & Internet, click on the Status tab, and activate Network reset. Then, confirm by clicking Reset now.