There are some processes in Windows 10 which known to be causing your PC to 100% CPU usage. This processess is related to the Windows update process sometimes even cause your PC to a halt.
Do we really need this process on our Windows 10 PC and can we disable this process? But unfortunately, You cannot disable this process but what you can do is, you can reset the update services and delete some cache files on software distribution folder. By doing, this you can solve the Windows Modules Installer worker 100% CPU usage issue.
Solution 1. Delete SoftwareDistribution folder
Whenever Microsoft release a new Windows update, by default all files updates files stored in the SoftwareDistrubution folder. But sometimes, the downloaded files get corrupted and when windows continuously checking for the updates this result in Windows modules installer worker high CPU usage in Windows 10.
Windows by default downloads and stores new updates in the SoftwareDistribution folder. Sometimes, the downloaded files can get corrupted and may result in high CPU usage due to consistently Windows checking for updates.
On of the best way to fix this issue is to remove the SoftwareDistribution folder fro your Windows 10 PC and refresh the Windows update.
Here is how you can do it.
But in order to delete the SoftwareDistribution Folder to fix the issue Windows Modules installer worker issue. You must first, stop the Windows update service from the Services interface so that you shouldn’t get an error while deleting the SoftwareDistribution folder.
-
Press Windows Key + R button on your Keyboard, to open Run.
-
Type services.msc and hit enter.

-
In the Service window, look for Windows Update service. Right click and select Stop.

Now close the Windows Services window on your desktop and follow the below steps to delete SoftwareDistribution Folder.
Open “File Explorer” on your Windows 10 PC and navigate to the following below location.
C:\Windows
Here you will find the folder called “SoftwareDistribution” select the folder and delete it
Now Reboot your PC and check for Update again.
Go to Settings > Update and Security > Windows Update > Check for update.
Installed all the pending updates and restart your PC. Now monitor if the Windows Modules Installer Worker processes still causing high CPU again.
Solution 2: Run Windows Troubleshooter
If the above solution didn’t worked for your and your Windows 10 PC still causing high CPU usage for Windows Module Installer Worker on Windows 10. Then try to run the Windows Troubleshooter. Microsoft has specially designed Windows Troubleshooter to find and fix issues Windows updates related issues.
Here is how you cab do it.
-
Click on Start and select Settings.
-
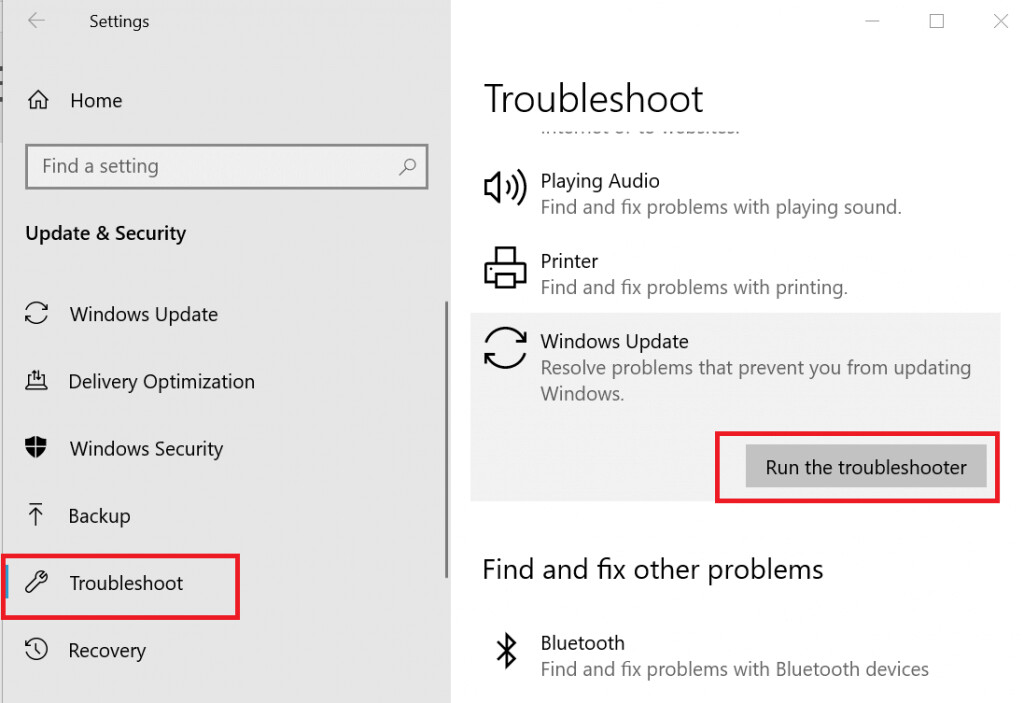
Go to Update and Security and click on the Troubleshoot tab.
-
Scroll down and click on Windows Update under Troubleshoot section.
-
Now click on “Run the Troubleshooter” button to start the Windows troubleshooter scanning. Your PC now initialize the diagnostic.
Now you have to follow the on-screen instructions to apply the recommended fix.
Reboot your PC, After applying recommended fix. Now check Windows Modules Installer Worker issue is resolved on your PC.
By following the above two solution you can fix the Windows Modules Installer Worker high CPU usage in your Windows 10 PC.