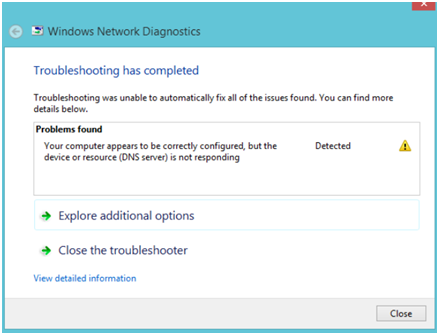
The Following solution will help you fix ‘Your Computer Appears to be Correctly Configured, but the Device or Resource (DNS server) is not Responding’ error
You can face this problem when you run a network troubleshooter on any Windows after Windows 7. This message basically means that there is a problem with your DNS. It further means that this problem is causing additional Internet connection issues.
This problem is not uncommon. It occurs quite often and thus, people are constantly looking for new solutions and ways to resolve it. In this article, we have collected all the working methods so that people struggling with this problem will have an easier time dealing with it.
What is the reason behind this issue?
There are not many causes behind this error. There is a very limited list of reasons that can cause this issue, and being a DNS related problem, that is to be expected. Before going further, it is imperative that you learn what is the actual cause behind your error because understanding the reason is essential for solving the problem. Here are the potential causes:
- The first cause can be outdated or faulty network drivers. If you have not updated your drivers, then you should do so without delay. Updating the drivers will also prevent this sort of error from appearing in the future as well.
- The other cause for this issue is that you could be using the wrong DNS or IP addresses. If you run into this error, then the way to go is to switch back to default settings or switching the DNS server to Google.
The First Solution: Rollback or Update your Network Drivers
When it comes down to it, rolling back and updating are two completely different and contrary actions. Updating means upgrading to a better version while rolling back means retracting it back to an older and previous version.
Updating can work for you if the problem is caused by you using out-of-date, rusty drivers that are no longer supported. Updating might be the only thing you need to resolve the issue.
Rolling back can be useful if the problem was caused after you updated your drivers. If the problem occurred after you did the update, then most certainly it will be evident that the issue is caused by the change in the driver. Furthermore, you should also perform the rollback or the update on your network device.
-
The first step you need to follow is to uninstall the driver you may have installed on your system beforehand.
-
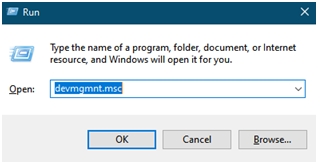
Go to the search tab near the start menu and type in ‘Device Manager’. Open the Device Manager window. Another way to get to it is to use the Windows key + R shortcut and get to the Run dialog box. Enter devmgmt.msc in the box and press OK.
-
Expand the ‘Network Adapters’ portion. Doing this will show all the network adapters that are installed in the system at that time.
Performing an update for the Driver
-
Press right-click on the driver you want to uninstall and choose Uninstall Device. Doing this will remove the adapter from the displayed list and the network device will be uninstalled.
-
Press ‘OK’ when you are asked for confirmation to uninstall the device.

-
Remove the adapter you are using from the computer. Go to the Manufacturer’s Page and browse through the list of available adapters for your operating system. Select the latest one and download it. After that, go to the Downloads folder and run it.
-
You will then be shown some instructions. Follow those in order to install the driver. If the adapter you are using is an external, detachable adapter such as a Wi-Fi dongle, then take care to keep it disconnected until the installation Wizard tells you to connect it. After that, reboot your computer and check if you are still facing the problem.
Performing a rollback for the driver
-
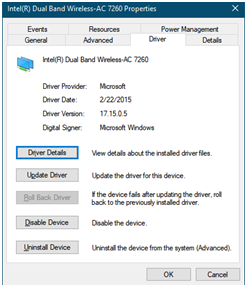
Press right-click on the driver you are looking to uninstall. Go to the properties and from the Properties Window, go to the Driver’s tab. Find the Roll Back Driver option.
-
If you see that the option is grayed out and is not available, then it means that your driver has not gone through a recent update, and hence it does not remember any recent files to which it can rollback. This further shows us that this is not the cause for the issue otherwise the option would have been available.
-
If, on the other hand, you see that the option is available, then go ahead and press it. Follow the instructions to complete the procedure.
The Second Solution: Changing the IP Address and the DNS
Another solution to this problem is changing the IP address and the DNS. This may actually be the cause as well. If you have changed these settings in the past, then your applied changes may be the issue. You should revert back to the default settings if you want to resolve the issue. And if you have not tampered with these problems in the past, then you should change the DNS to other DNS addresses such as Google’s address which is available for free. Here are the instructions you can follow:
-
Press the Windows Key + R key. This should open up the Dialog Box where you should type ‘ncpa.cpl’. Press OK to open up Internet Connection settings in the Control Panel.
-
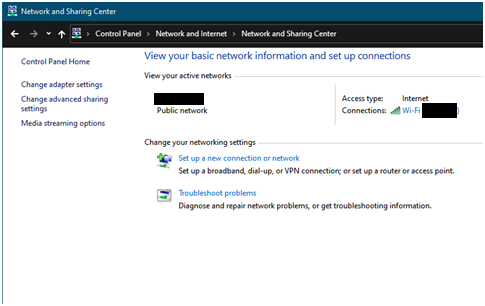
You can also do this in the Control Panel manually by going to Network and Internet settings. From there go to the Network and Sharing Center. On the left menu, find the ‘Change Adapter Settings’
-
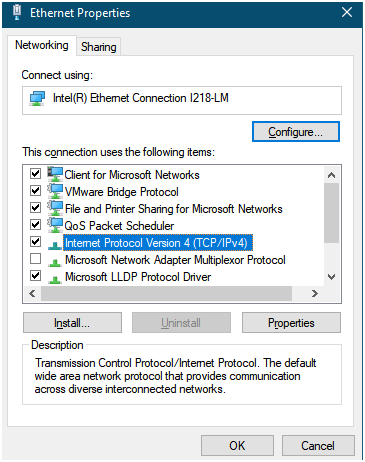
After using either method, the Internet Connection window will open. Choose your current network adapter and press right-click. If you have admin controls, go to the properties.
-
Find the ‘Internet Protocol Version 4 (TCP/IPv4)’ on the list. Select it by clicking on it and go to ‘Properties’ by pressing the button that will appear below.
-
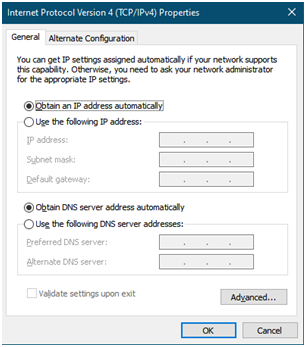
In the general tab, there will be two sections, on top of which will be the options of ‘Obtain an IP address automatically’ and ‘Use the following IP address’. The same will be given below of DNS address. Keep both buttons on ‘Obtain an IP address automatically’ and ‘Obtain a DNS address automatically’. Do this if the buttons were set to something else.
-
If the buttons were automatically set to the abovementioned options, then keep the ‘Obtain an IP address automatically’ as it is and for the DNS settings, go for ‘Use the following DNS address’. Enter 8.8.8.8 and 8.8.4.4 for Preferred and AlternateDNS Servers respectively.
-
Check the option ‘Validate settings upon exit’ and then press OK to apply changes. See if you are still facing the issue after this.
This is the second most common solution to fix the error Your Computer Appears to be Correctly Configured, but the Device or Resource (DNS server) is not Responding in Windows 10
The Third Solution: Clearing the DNS Cache and Resetting the IP settings
It is a common opinion that this solution is the most effective, easy, and simple way to go when facing any sort of connectivity issues and not just the one in discussion right now. Despite its simplicity, it works and people have said that this is the only option that resolves the issue. Here is how to do it.
-
Go to the ‘Command Prompt’. You can either search for it in the search bar or the Start menu. When searching, click the first entry that you see and select ‘Run as Administrator’.
-
Another way to get to it is to use the dialog box by pressing Windows Key + R. Type in ‘cmd’ and you will get access to the Command Prompt as admin.
-
Enter the following commands and press enter after each one. Wait to see a confirmation or success message to know that your message worked.
a. ipconfig/flushdns
b. ipconfig/release
c. ipconfig/release6
d. ipconfig/renew
Connect to the internet again and see if you are still facing any issue. These are the most common solution for the error Your Computer Appears to be Correctly Configured, but the Device or Resource (DNS server) is not Responding in Windows 10