Hello
there are some ways and you can try them
- Reboot the system with no network connectivity
The system needs to be connected to the network to read the status of its link to the organization. However, a lesser-known fact is that we do not need to log in to the system to connect it to the Internet. If any network were set to default, the system would connect to the network before it reached the lock screen. We would need to disconnect the network and reboot the system to isolate this issue.
You can see the Network connectivity icon at the bottom-right corner of the screen. Disconnect from the network from there. If that isn’t possible, try to disconnect the sources of the network connection manually (e.g., plug out the ethernet cable or switch off the WiFi router).
- Remove the user from the protected user group
The protected user group is managed by an organization’s IT team, or in general by the server admin of a group of managed systems. If a user is added to this group, he might face issues logging in normally, especially is the addition is recent. At times, it changes the associated domain (has happened with me twice). Thus, we would have to contact the team controlling the permissions in the active directory to make changes accordingly.
- Using Security policy snap-in
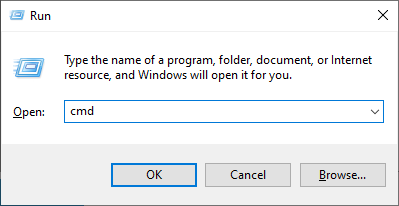
1- Press Win + R to open the Run window. Type the command secpol.msc and press Enter to open the Security Policy snap-in.
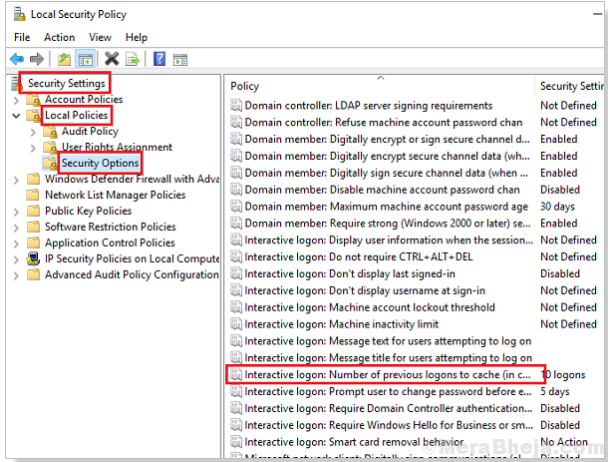
2- Go to Security Settings >> Local Policies >> Security Options .
3- On the right pane, locate the policy Interactive logon: Number of previous logons to cache (in case of domain controller is not available) and double-click it to change its value. Change the value if “Do not cache logons” to 0.
- Change the DNS server address
1- Press Win + R to open the Run window and type the command ncpa.cpl . Press Enter to open the Network Connections window.
2-Right-click on your network adapter select Properties . You might need administrator permission for the same.
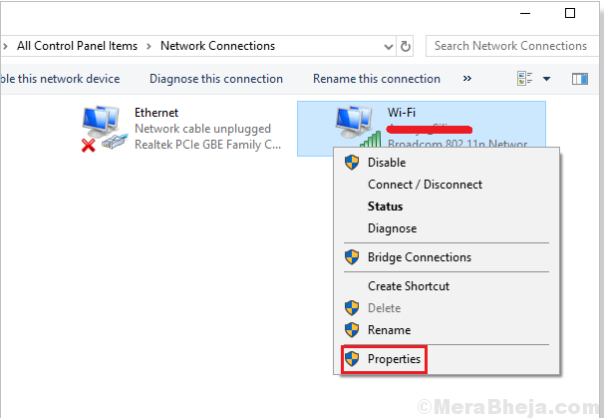
then select
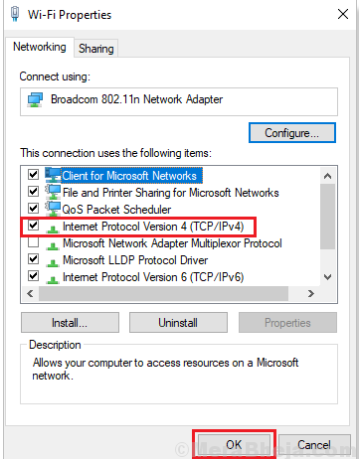
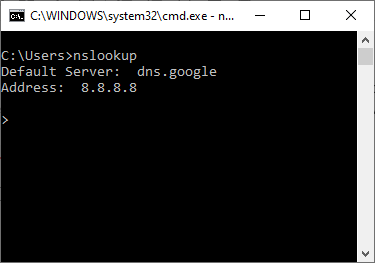
Right-click on it and enter Google DNS servers
Preferred DNS address: 8.8.8.8
Alternate DNS address: 8.8.4.4
- Remove corrupted profile from registry editor
-
Search regedit in the Windows 10 search box and open the registry editor.
-
Before proceeding, please back up the Registry editor by going to file > Export in the registry editor.
-
Now, go to the following location in the registry editor.
HKEY_LOCAL_MACHINE\SOFTWARE\Microsoft\Windows NT\CurrentVersion\ProfileList
- Expand profile list and find the key in the left menu having .bak in the end in the format (S-1-5-21-XXXX…XX), where xx….xx is any number.
There must be another key with the same number without having .bak at the end. Delete that.
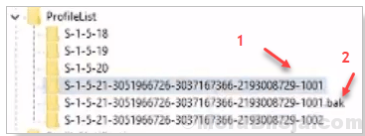
-
Now, rename the key with .bak at the end and remove .bak from the end.
-
Restart your computer
I hope this will help you.
