Before enabling Windows Sandbox in your device you need to make sure virtualization is enabled on your device. Please follow the below process to confirm the enable of virtualization feature.
Enabling virtualization
To confirm your device supports hardware virtualization and the feature is enabled in the Basic Input/Output System (BIOS) or Unified Extensible Firmware Interface (UEFI) firmware use these steps:
- Open Start .
- Search for Command Prompt and click the top result.
- Type the following command and press Enter :
systeminfo.exe - Under the “Hyper-V Requirements” section, if “Virtualization Enabled In Firmware” reads Yes , then you can use Windows Sandbox.![]

or Simply type msinfo32 in the search and open system information tool and confirm the below:
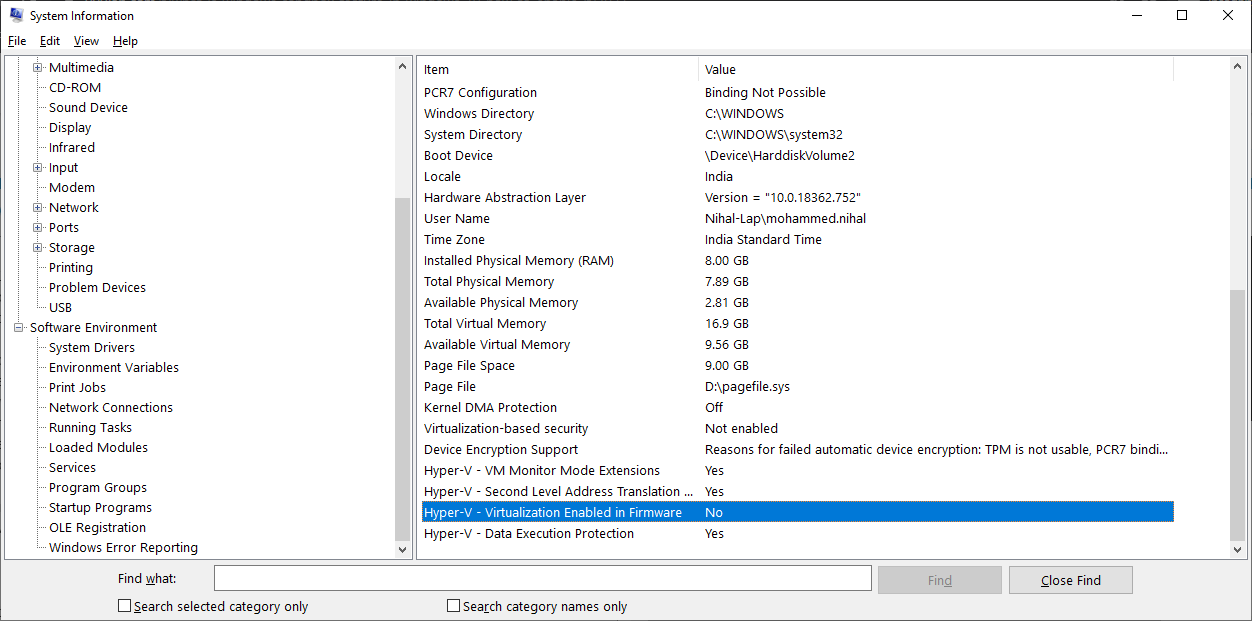
In my device the virtualization is disabled, to enable I’ll need to start my device in its BIOS or UEFI firmware and enable the feature. This process typically requires hitting one of the function keys (F1, F2, F3, F10, or F12), the ESC, or Delete key as soon as you start your computer. However, these settings will vary by manufacturer, and even by computer model. So make sure to check your device manufacturer’s support website for more specific instructions.
Enabling Windows Sandbox
To enable Windows Sandbox on Windows 10 version 1903 or later, use these steps:
- Open Start .
- Search for Turn Windows features on or off , and click the top result to open the Windows Features experience.
- Check the Windows Sandbox option.
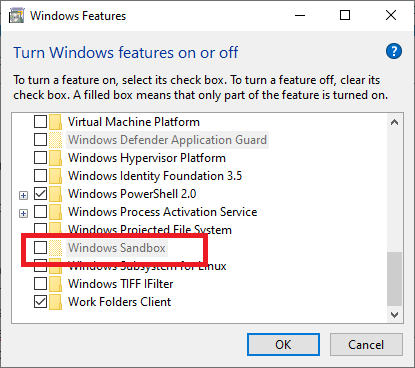
- Click the OK button.
- Click the Restart now button.
After completing the steps, you can start using the new virtualization layer to temporarily install and test untrusted applications.