Hi @syed12,
Please refer the below drivereasy.com perfect article and follow the step by step solution they have written. I can guarantee this is the exact solution to your problem.
To use the solutions below, you’ll need to prepare a bootable USB or a DVD with an installation file on it. If you are not sure how to create a bootable USB, refer How to Burn Windows 10 ISO to USB. Note you need to do this on another computer.
First start your PC from the USB or DVD and open Command Prompt
For USB bootable way:
Plug the USB the computer that has the problem.After you power on the computer, press function key, usually F2 or F12, to enter boot menu. The key to enter boot menu depends on the computers that you are using. You can go to the PC manufacturer’s website to check for it.
For DVD bootable way:
Insert the DVD to the computer that has the problem. Wait until you see the message “Press any key to boot from CD or DVD”. Press any key to continue. If you don’t see this message, you probably have to change the boot order in the BIOS (Basic Input/Output System) .
Learn How to Boot from a USB Drive, DVD or CD.
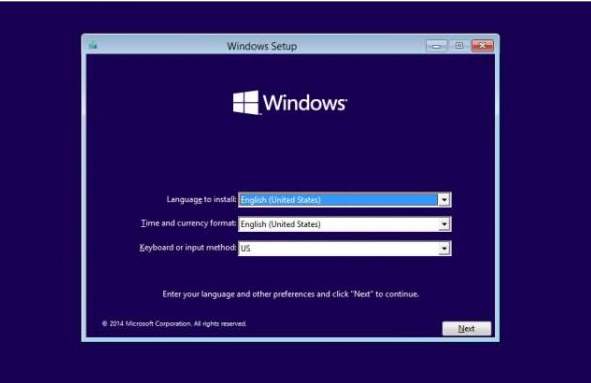
- When you go to the setup screen, select the Language that you wish to use.
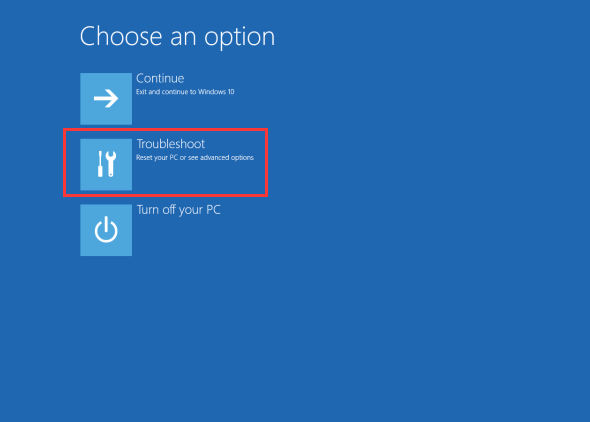
- Then you will see the Windows Install screen, select Repair your computer at the bottom left corner.

- In Choose an option screen, select Troubleshoot .
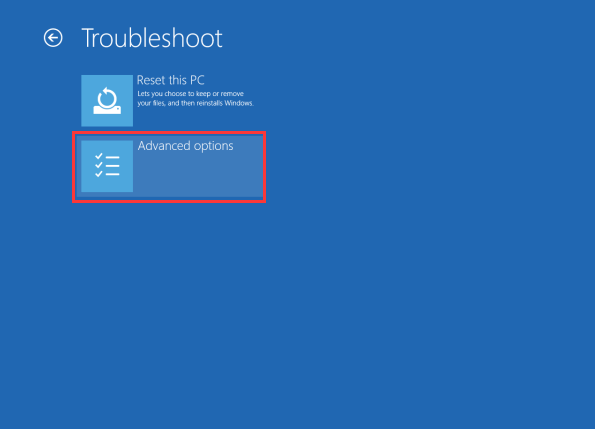
- Then select Advanced options .
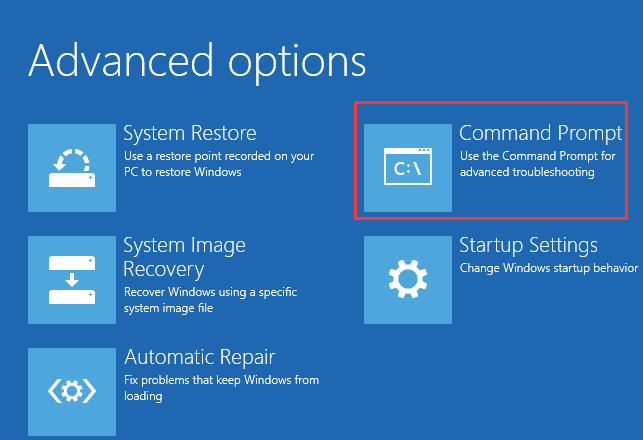
- In Advanced Options screen, select Command Prompt . Then a new screen will be displayed with and open command prompt. If you are prompted to enter password, enter your Windows password.
After opening the Command Prompt window, use below solutions to fix the loop error.
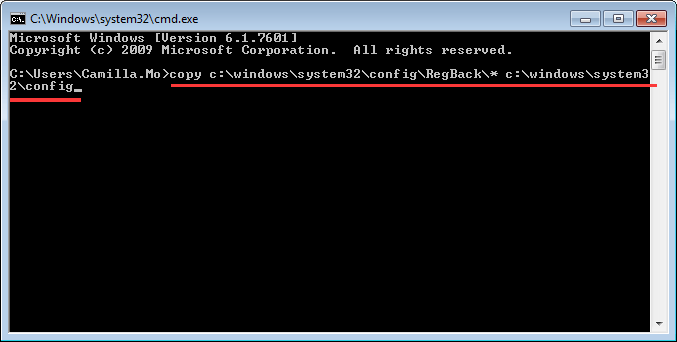
Solution 1: Restore Windows Registry
Follow these steps:
- In Command Prompt, type copy c:\windows\system32\config\RegBack* c:\windows\system32\config and hit Enter .
-
If prompted to overwrite existing files, type All and hit Enter .
-
Type exit and hit Enter to close the Command Prompt window.
-
Restart your computer.
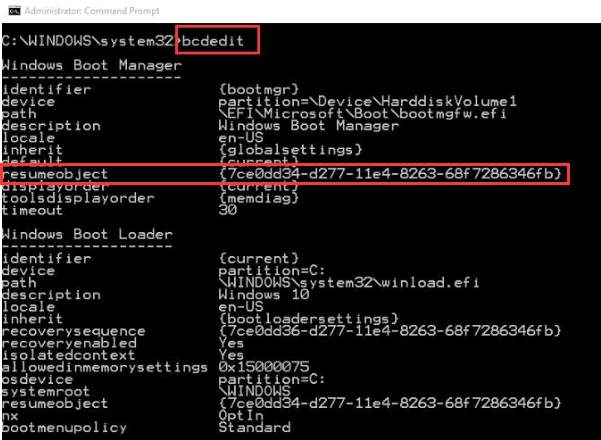
Solution 2: Disable Automatic Startup Repair
- In Command Prompt, type bcdedit and hit Enter . Then you will see the result displayed. Look for resumeobject item and note the number next to it (In below case, the number is 7ce0dd34-d277-11e4-8263-68f7286346fb).
-
Type bcdedit /set GUID recoveryenabled No and hit Enter . Replace GUID with the number that you noted in last step. (For example, if the number is 7ce0dd34-d277-11e4-8263-68f7286346fb, the full command will be “bcdedit /set 7ce0dd34-d277-11e4-8263-68f7286346fb recoveryenabled No”)
-
Reboot your PC and Windows should start without no problem.
Solution 3: Remove Your RAM
The loop error can be fixed by simply removing the RAM. You can try this solution. Before removing, remember to turn off the PC.If you have more than one RAM, remove one at a time then start your PC without it. You might need to do this a few times until you test every RAM module.
After entering Windows, run a disk check to check if there is any problem with the disk, and run a system file check to check if some system files are corrupted. If neither of them work, try to restore Windows registry.
Run a disk check
Follow steps below:
-
Open Command Prompt as an administrator.
-
Type chkdsk /f /r and hit Enter . You need to wait a while until the process completes.

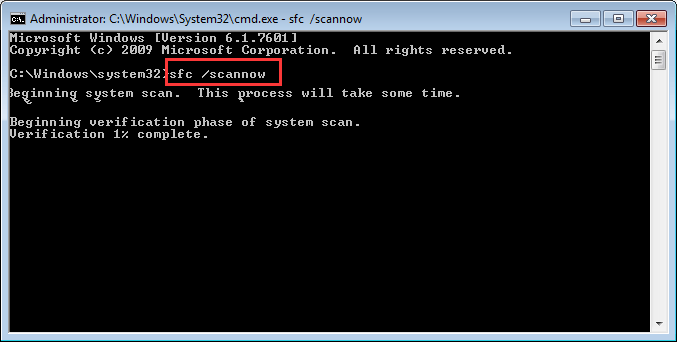
Run a system file check
Follow steps below:
-
Open Command Prompt as an administrator.
-
Type or paste sfc /scannow and hit Enter . The process will also take some time to complete.
I hope the solutions here will help you fix the Windows 10 Automatic Repair loop error.
Credit: drivereasy.com